Scope a Project from the Entity Hierarchy
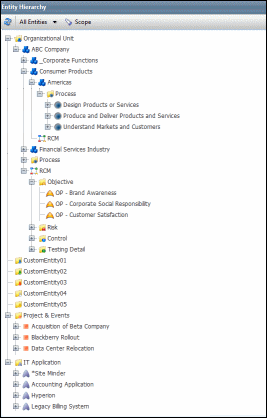
 Access the entity hierarchy.
- Click
 Scope from the navigation bar.
 - Click
 Expand next to an entity to view all objects within it.
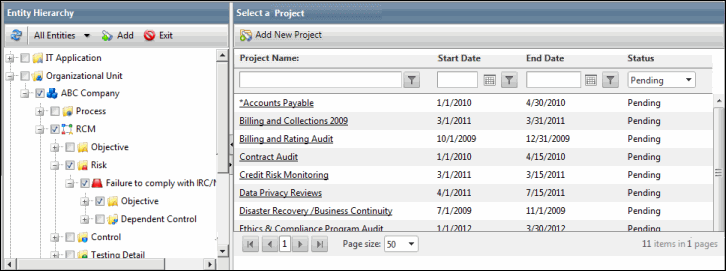
 - Select the checkbox for each object you wish to include in the scope.
Note: In the expanded mode, selecting a folder or entity automatically selects all the objects under it while double-clicking an entity or object displays it in a pop-up window.
- Click
 Add. A search screen displays the list of projects available in the system. Note that you can view and modify only those projects for which you have proper permissions in the Governance Portal. Rest of the projects will be disabled.
Note: Click
 Exit to exit the scope mode.
- Add New Project: Click
 Add New Project on top of the screen to create a new project and add the selected objects to its scope.
Note: See Schedule a New Project for more information on how to create a project.
- Filtering the Project List: Click
 Filter next to the column you wish to filter and select an operator from the drop-down list.
 - Project Name: Type a value in the text box below the Project Name column.
- Start Date and End Date: Sort the project list by date by specifying a date in the text box below the Start Date and/or the End Date columns, or use the
 Calendar to do so.
 - Status: Use the Status drop-down list to filter the project list by their status.
- Scope the Project: Click the project from the list to add the selected objects in the tree to its scope. The Project Scope section of the selected project displays with the new scoped objects included. The records and RCM sub-objects get copied to the scope of the project, which means that a new copy of the object will be created in the Project RCM, thereby, preventing the changes made to the object in the Core RCM to be reflected in the Project RCM. If there are additional RCM sub-objects that are yet to be copied into the project scope after the initial scoping, they can be copied to the project scope by clicking the Import from RCM link from the project page. Therefore, the records present under the RCM sub-object list are already copied to the project, and hence, are scoped in automatically. If a specific RCM sub-object is not present in the list, it implies that it has not yet been copied in to the scope. For more information, see Project Settings.
Notes:
- The Scope button will be disabled when the All Entities filter will be selected. The same will be notified to the user through a message, when the mouse cursor is hovered over the Scope button.
- The All Entities filter is disabled in the Scope mode and is enabled once the user exits the scope mode.
- The objects in a Project scope will be retained even if the corresponding objects in the Entity Hierarchy are deleted. The scoped objects will not be deleted simultaneously. This applies to the core entity as well. If the core entity is deleted in the Entity Hierarchy, it's copy will be retained in the project scope.
- You cannot delete the entity which has been linked to one or more project(s). You must first unlink the entity from the associated project(s) in order to delete the entity.
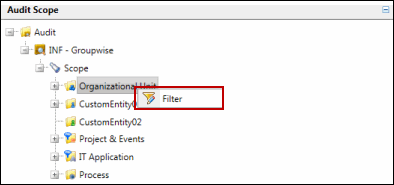
- Right-click the entity and select Filter to apply a filter to the project scope. The
 icon on an entity denotes that the filter has been applied on a project scope.
Note: Define the scope settings before you scope a project from the Entity Hierarchy. For more information, see Project Settings.

